
Footer section
The Footer is an important part of your store layout as it appears on every page and provides customers with quick access to essential information and navigation links. With the Opulence theme, the footer is designed to be flexible and visually organized, allowing you to display menus, policies, newsletter signup, and important store details in a structured layout.
The footer helps improve the user experience by making it easier for customers to find information such as policies, contact details, and additional navigation links. It also supports branding elements like logos and social media icons, helping you maintain a consistent brand identity across your store.
Steps to Set Up the Footer Section in Your Shopify Theme, Opulence
Steps
- From your Shopify admin, go to Online Store → Themes.
- Click Customize on the Opulence theme.
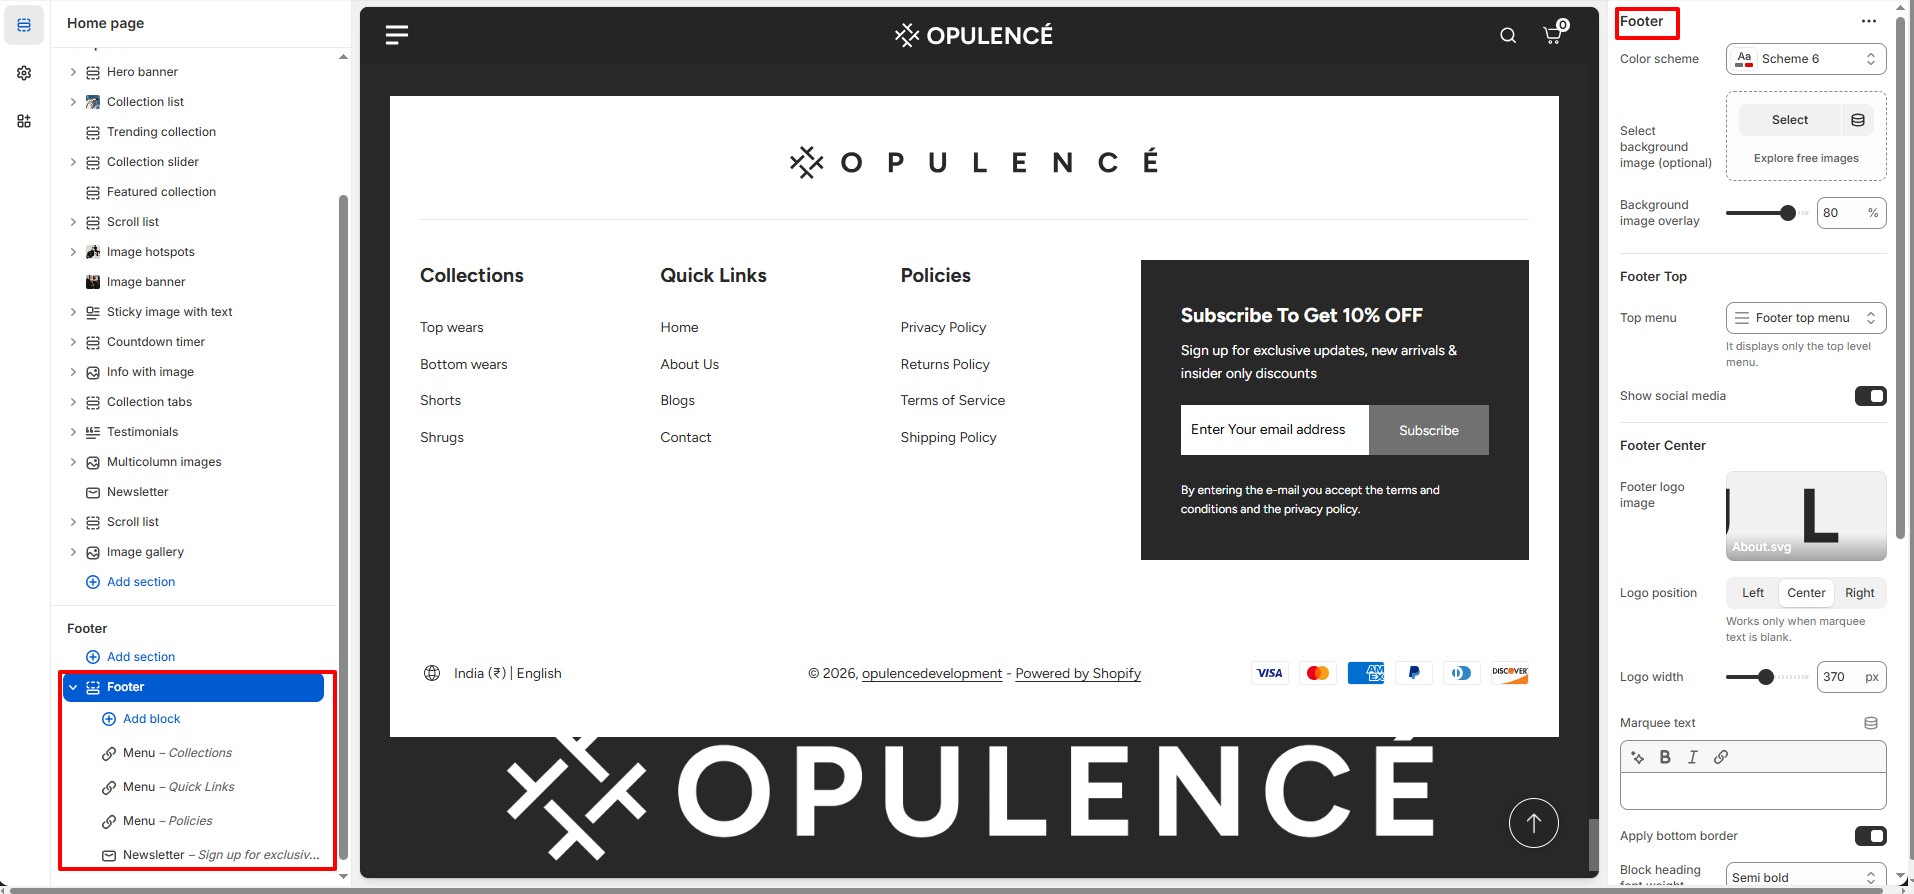
- In the Theme Editor, scroll down and select the Footer section from the left sidebar.
- Adjust the settings, blocks, and layout options according to your preferences.
- Click Save to apply your changes.
- Color Scheme: Choose a color scheme to control the background and text colors of the footer section.
- Select Background Image (Optional): Upload an image to display as the background of the footer for a more visually appealing design.
- Background Image Overlay: Adjust the overlay opacity to improve text visibility when a background image is applied.
- Top Menu: Select the menu that will appear at the top of the footer. This menu typically contains quick navigation links such as Contact, Blog, FAQs, or About pages.
- Show Social Media: Enable this option to display social media icons in the footer. These icons link customers to your social platforms such as Facebook, Instagram, YouTube, TikTok, X (Twitter), and Pinterest.
- Footer Logo Image: Upload a logo image to display in the center section of the footer.
-
Logo Position: Choose where the logo appears within
the footer layout.
- Left – Displays the logo aligned to the left.
- Center – Displays the logo in the center.
- Right – Displays the logo aligned to the right.
- Logo Width: Adjust the size of the footer logo displayed using the width slider.
- Marquee Text: Add scrolling text to display promotional messages, announcements, or brand highlights in the footer area.
- Apply Bottom Border: Enable this option to display a separator line between footer sections for a cleaner layout.
- Block Heading Font Weight: Adjust the font thickness of the footer block headings.
- Enable Follow on Shop: Enable this option to allow customers to follow your store through the Shop app.
- Show Localization: Displays language and country selectors in the footer so customers can change their region or language.
- Show Payment Icons: Enable this option to display accepted payment methods such as Visa, Mastercard, American Express, PayPal, and others.
- Bottom Logo: Upload an additional logo that will appear in the bottom section of the footer.
-
Section Spacing:
- Top Spacing: Adjust the space above the footer.
- Bottom Spacing: Adjust the space below the footer section.
Available Blocks in Footer
-
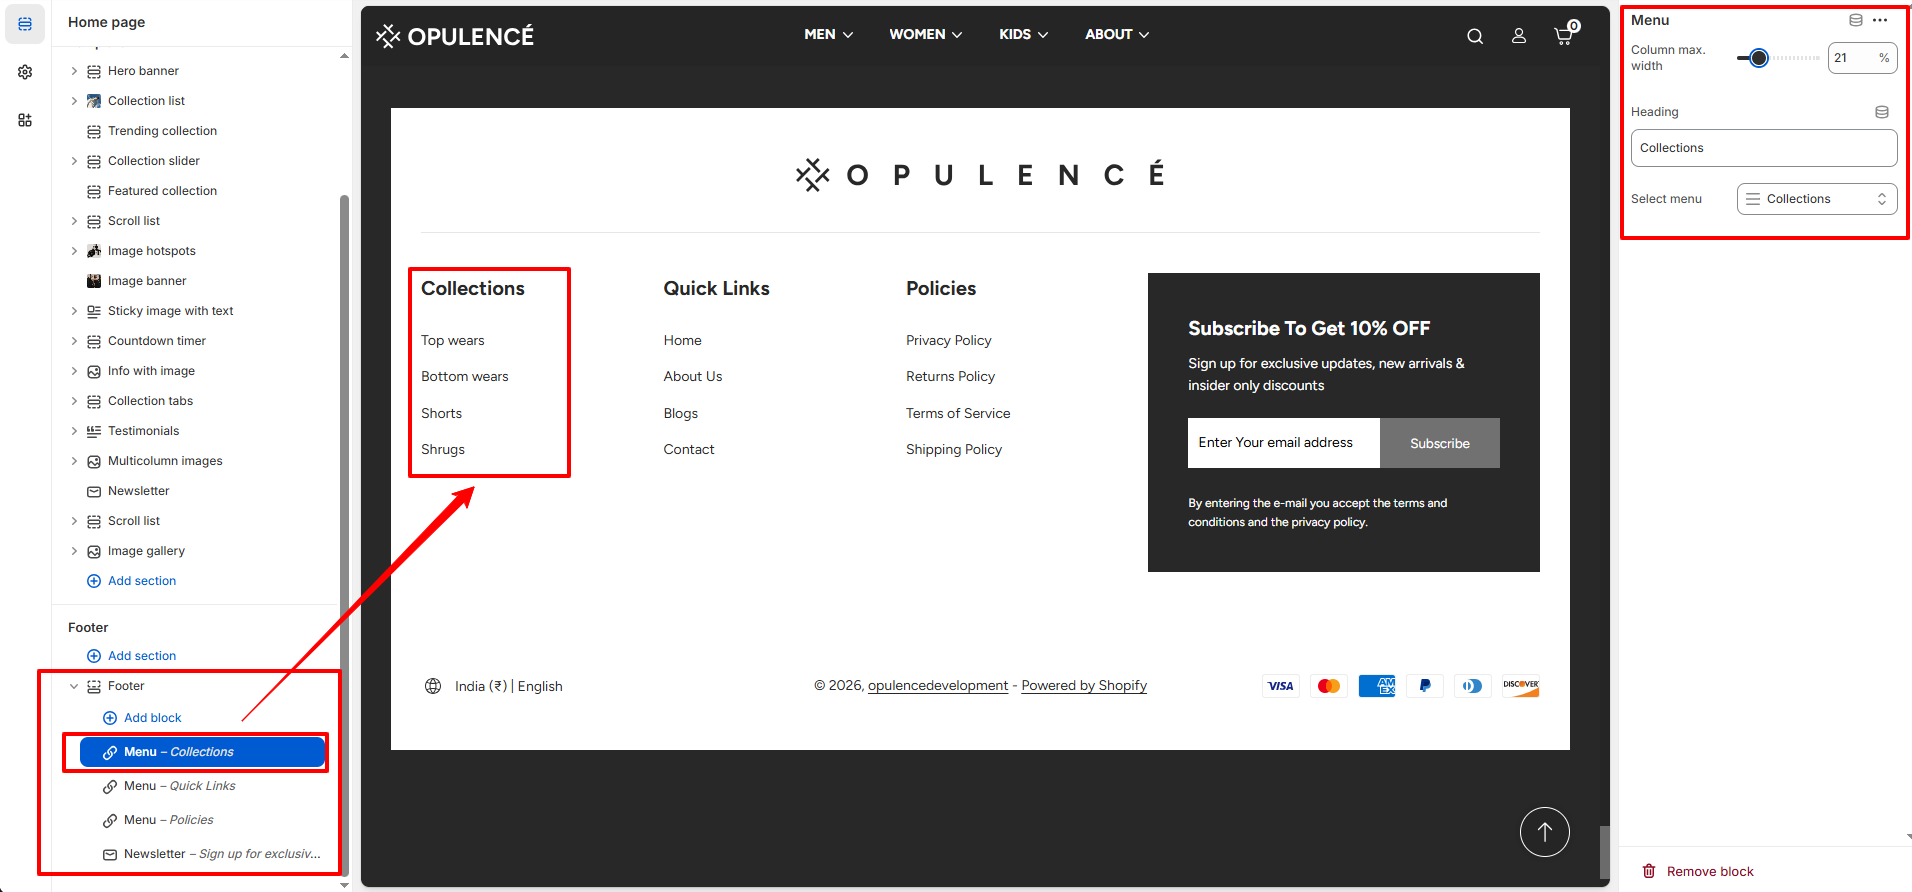
Menu Block:
The Menu block allows you to display navigation links in the footer.
You can use this block to organize important pages such as collections,
quick links, and store policies.
Menu Block Configuration- Column Max Width: Adjust the width of the menu column using the slider to control how much space the block occupies in the footer.
- Heading: Enter a title for the menu block. Example headings include Collections, Quick Links, or Policies.
- Select Menu: Choose a navigation menu from your Shopify menu list that will appear under this heading.
You can add multiple Menu blocks to display different groups of links in the footer area.
-
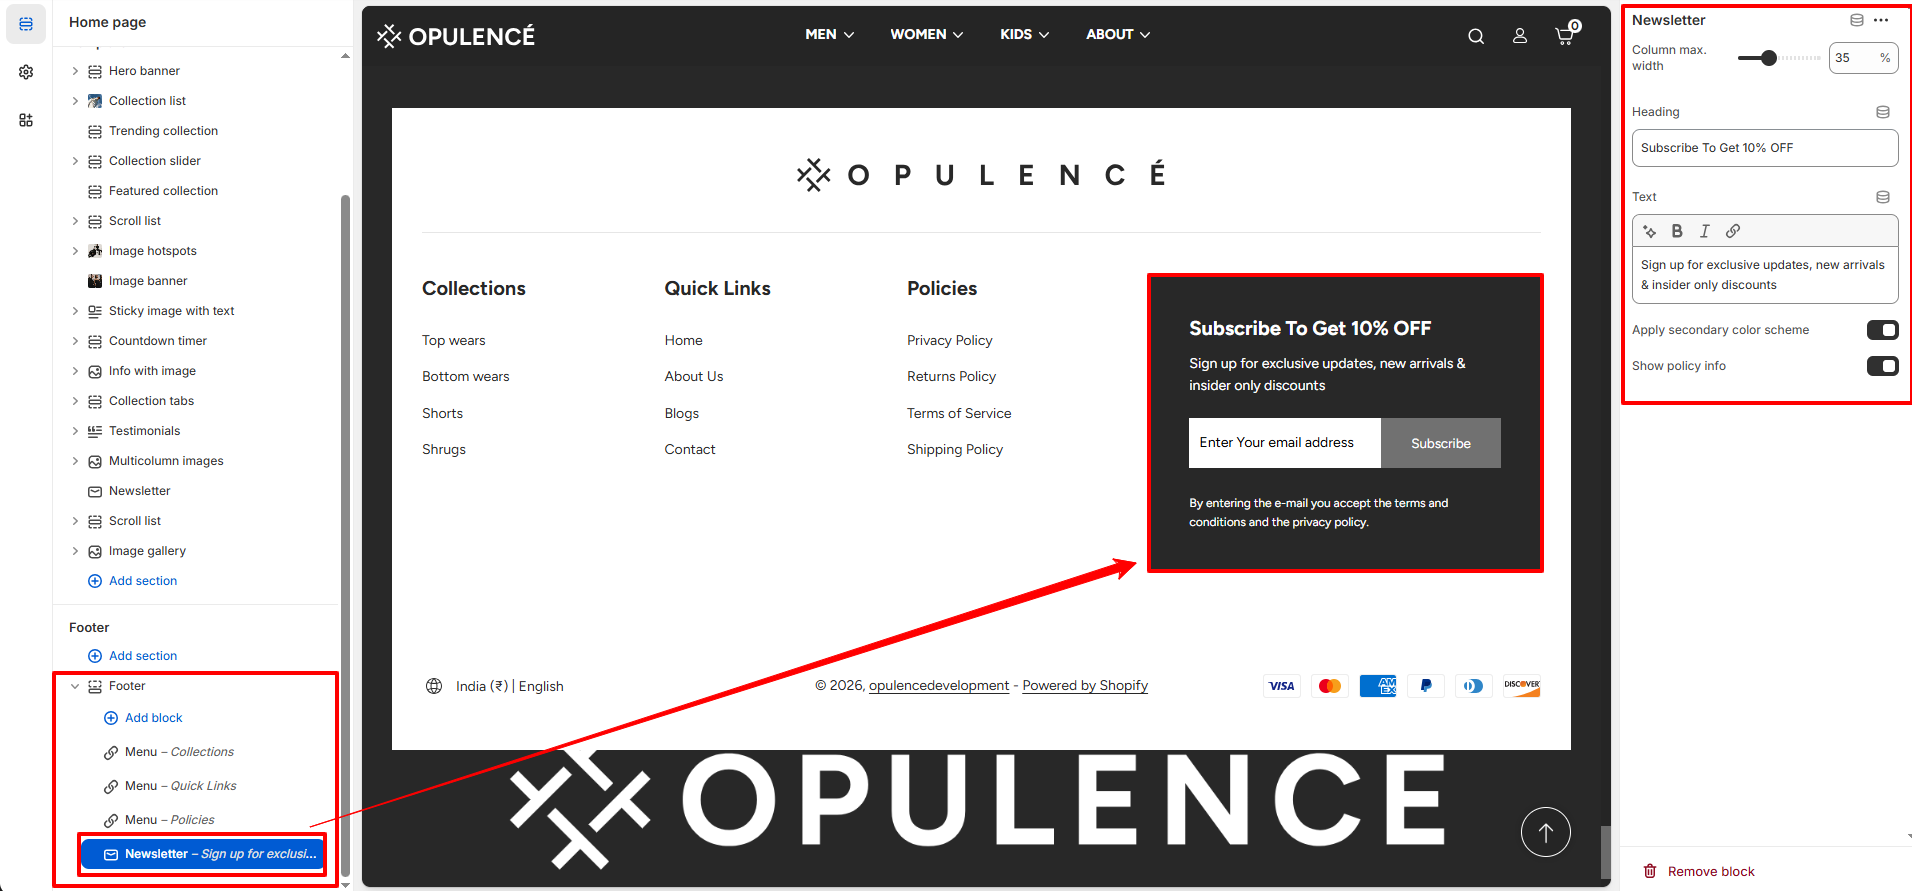
Newsletter Block:
The Newsletter block allows customers to subscribe to your email list
directly from the footer. It is useful for collecting customer emails
for promotions, updates, and exclusive offers.
Newsletter Block Configuration- Column Max Width: Adjust the width of the newsletter column using the slider. This controls how much space the newsletter block occupies in the footer layout.
- Heading: Enter a heading for the newsletter section. For example: Subscribe To Get 10% OFF.
- Text: Add a short description encouraging visitors to subscribe to your newsletter. This message usually highlights benefits such as exclusive updates, new arrivals, or special discounts.
- Apply Secondary Color Scheme: Enable this option to apply an alternative color scheme to the newsletter block for better visual emphasis.
- Show Policy Info: Enable this option to display additional policy information below the newsletter form, informing customers that by entering their email they accept the terms and privacy policy.
-
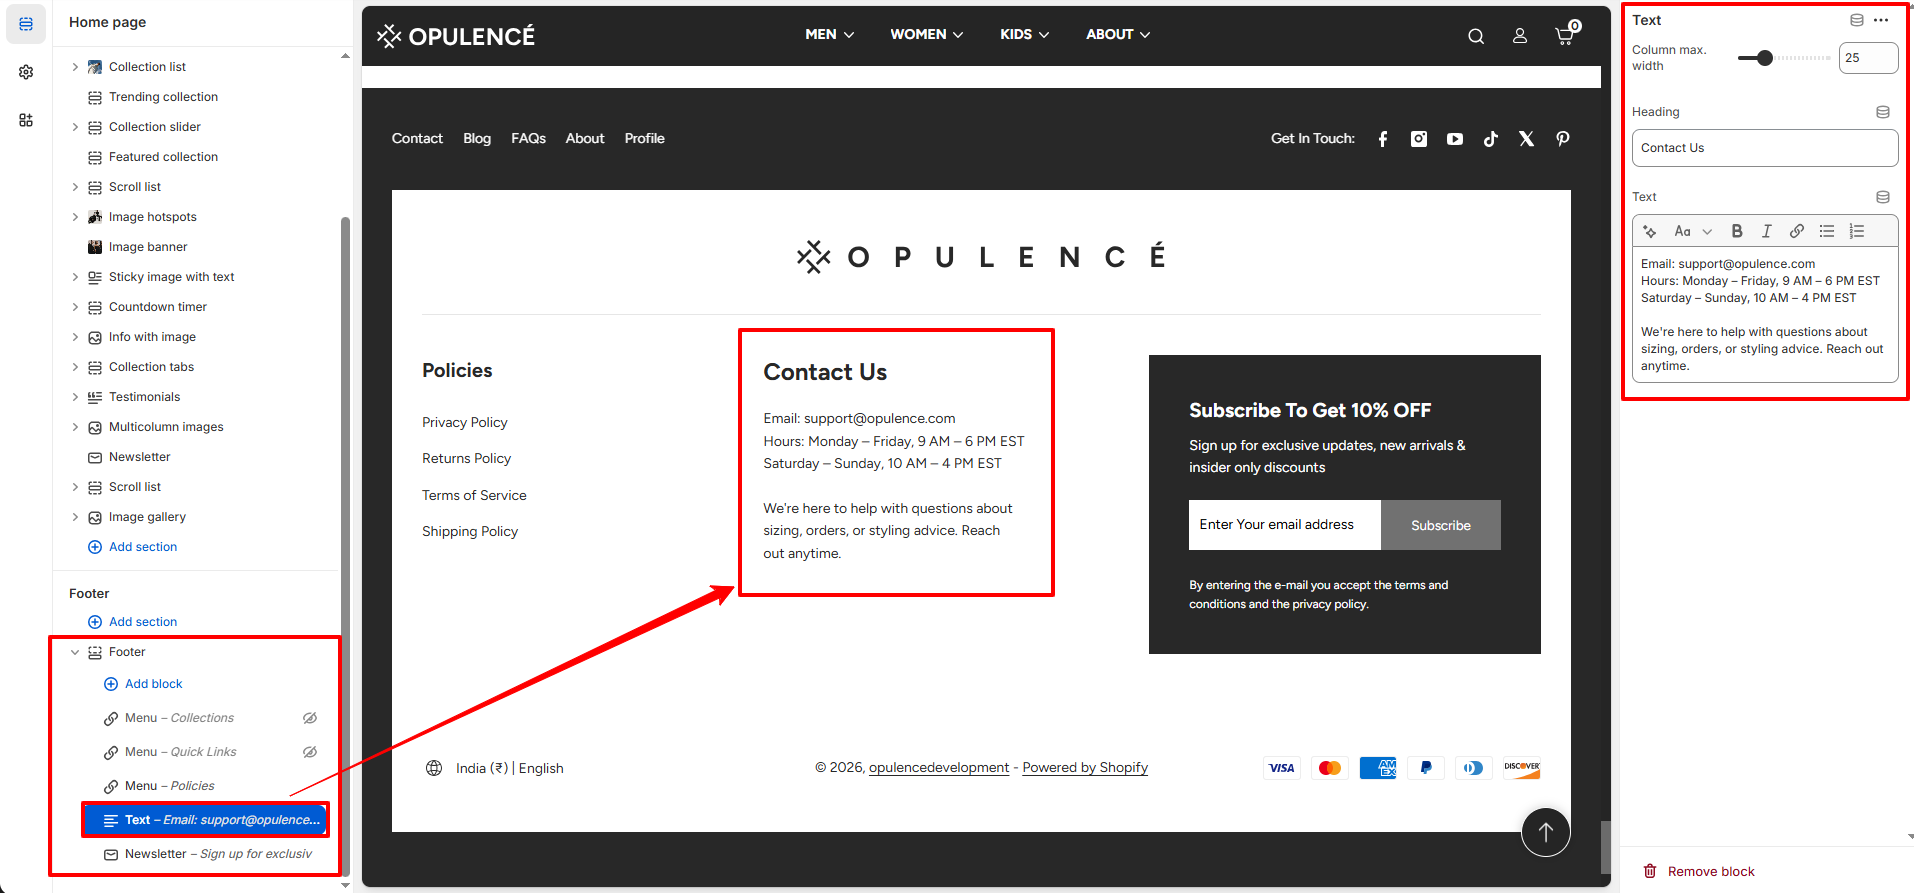
Text Block:
The Text block allows you to display custom text content in the footer.
It can be used to add store information, brand messages, contact details,
or any additional content you want customers to see in the footer area.
Text Block Configuration - Column Max Width: Adjust the width of the text block using the slider. This controls how much space the block occupies within the footer layout.
- Heading: Enter a title for the text block. This heading helps identify the content of the section, such as About Us, Store Information, or Contact Details.
- Description: Add the text content that will appear under the heading. This area can include a short description of your store, contact information, or any additional message you want to communicate to your customers.
FAQs
How do I add or edit links in the footer menus?
You can manage footer links by editing the navigation menus in your Shopify admin. Go to Content → Menus, create or edit a menu, and assign it to the appropriate footer block inside the Theme Editor.
How can I add social media icons to the footer?
To display social media icons, go to Theme Settings → Social Media and add your social profile links. Then enable the Show Social Media option in the Footer section.